AI Repair and Expansion Process
Date: 2024-12-15 Categories: AI-generated imagery
Table of Contents
- Preface
- 更详细的安装方法和comfyui的使用方法可以观看up主【醉石散客】的小白教程和文章了解基本的原理和概念 使用到的插件与模型的项目链接 ⬇ clip:https://huggingface.co/comfyanonymous/flux_text_encoders/tree/main vae:https://huggingface.co/black-forest-labs/FLUX.1-schnell/blob/main/ae.safetensors Fill:https://huggingface.co/black-forest-labs/FLUX.1-Fill-dev/tree/main T8量化Fill:https://huggingface.co/t8star FluxExt-MZ:https://github.com/MinusZoneAI/ComfyUI-FluxExt-MZ RMBG2.0:https://github.com/gorillaframeai/GF_nodes BEN:https://github.com/DoctorDiffusion/ComfyUI-BEN Inspyrenet:https://github.com/john-mnz/ComfyUI-Inspyrenet-Rembg BiRefnet v2:https://github.com/ZhengPeng7/BiRefNet 如果没有魔法可以在网盘中下载 下面为流程的安装文字版示例: 在网盘中有这些文件夹,首先选择下载启动器,两个均为秋叶的绘世启动器 ①为秋叶的最新的1.5版本没用进行文件插件的配置可以先观看小白教程进行使用; ②为我使用秋叶的1.5版本删去和安装好了一些插件的压缩包,因为模型文件太大我去掉了模型进行单独的下载。
- Effect Display
Preface
The model used in this process is the Flux_Fill model, currently the most powerful open-source model for redrawing and image expansion, with 120E parameters, and can be deployed locally.
You can first check the Feishu document to get the basic process, shared information, and effect demonstrations.

For more detailed installation methods and how to use ComfyUI, you can watch the beginner's tutorial and read the articles by Bilibili user 醉石散客 to understand the basic principles and concepts.
Project links for the plugins and models used ⬇
- clip:https://huggingface.co/comfyanonymous/flux_text_encoders/tree/main
- vae:https://huggingface.co/black-forest-labs/FLUX.1-schnell/blob/main/ae.safetensors
- Fill:https://huggingface.co/black-forest-labs/FLUX.1-Fill-dev/tree/main
- T8 Quantized Fill:https://huggingface.co/t8star
- FluxExt-MZ:https://github.com/MinusZoneAI/ComfyUI-FluxExt-MZ
- RMBG 2.0:https://github.com/gorillaframeai/GF_nodes
- BEN:https://github.com/DoctorDiffusion/ComfyUI-BEN
- Inspyrenet:https://github.com/john-mnz/ComfyUI-Inspyrenet-Rembg
- BiRefnet v2:https://github.com/ZhengPeng7/BiRefNet
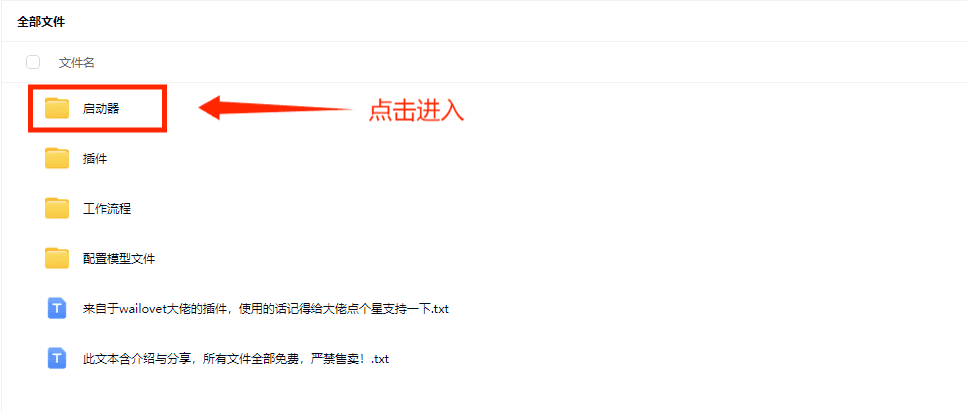
If you don't have a proxy, you can download it from the cloud storage.
Here is the text version example of the installation process:
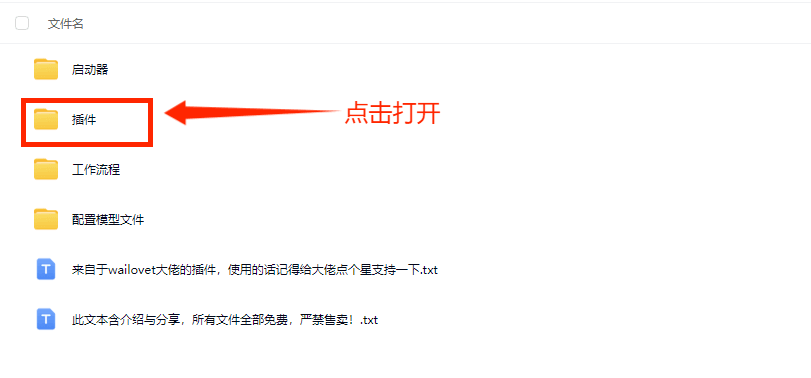
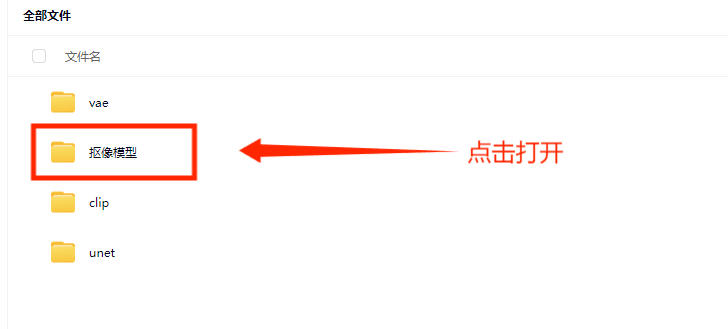
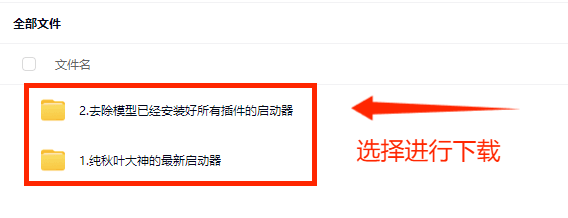
In the cloud storage, there are these folders. First, select and download the launcher; both are Qiuye's HuiShi launchers.
① is the latest version 1.5 by Qiuye, which hasn't undergone file and plugin configuration. You can first watch the beginner's tutorial to get started.
② is the compressed package where I used Qiuye's 1.5 version, removed some files, and installed certain plugins. Since the model files are too large, I removed them for separate downloading.

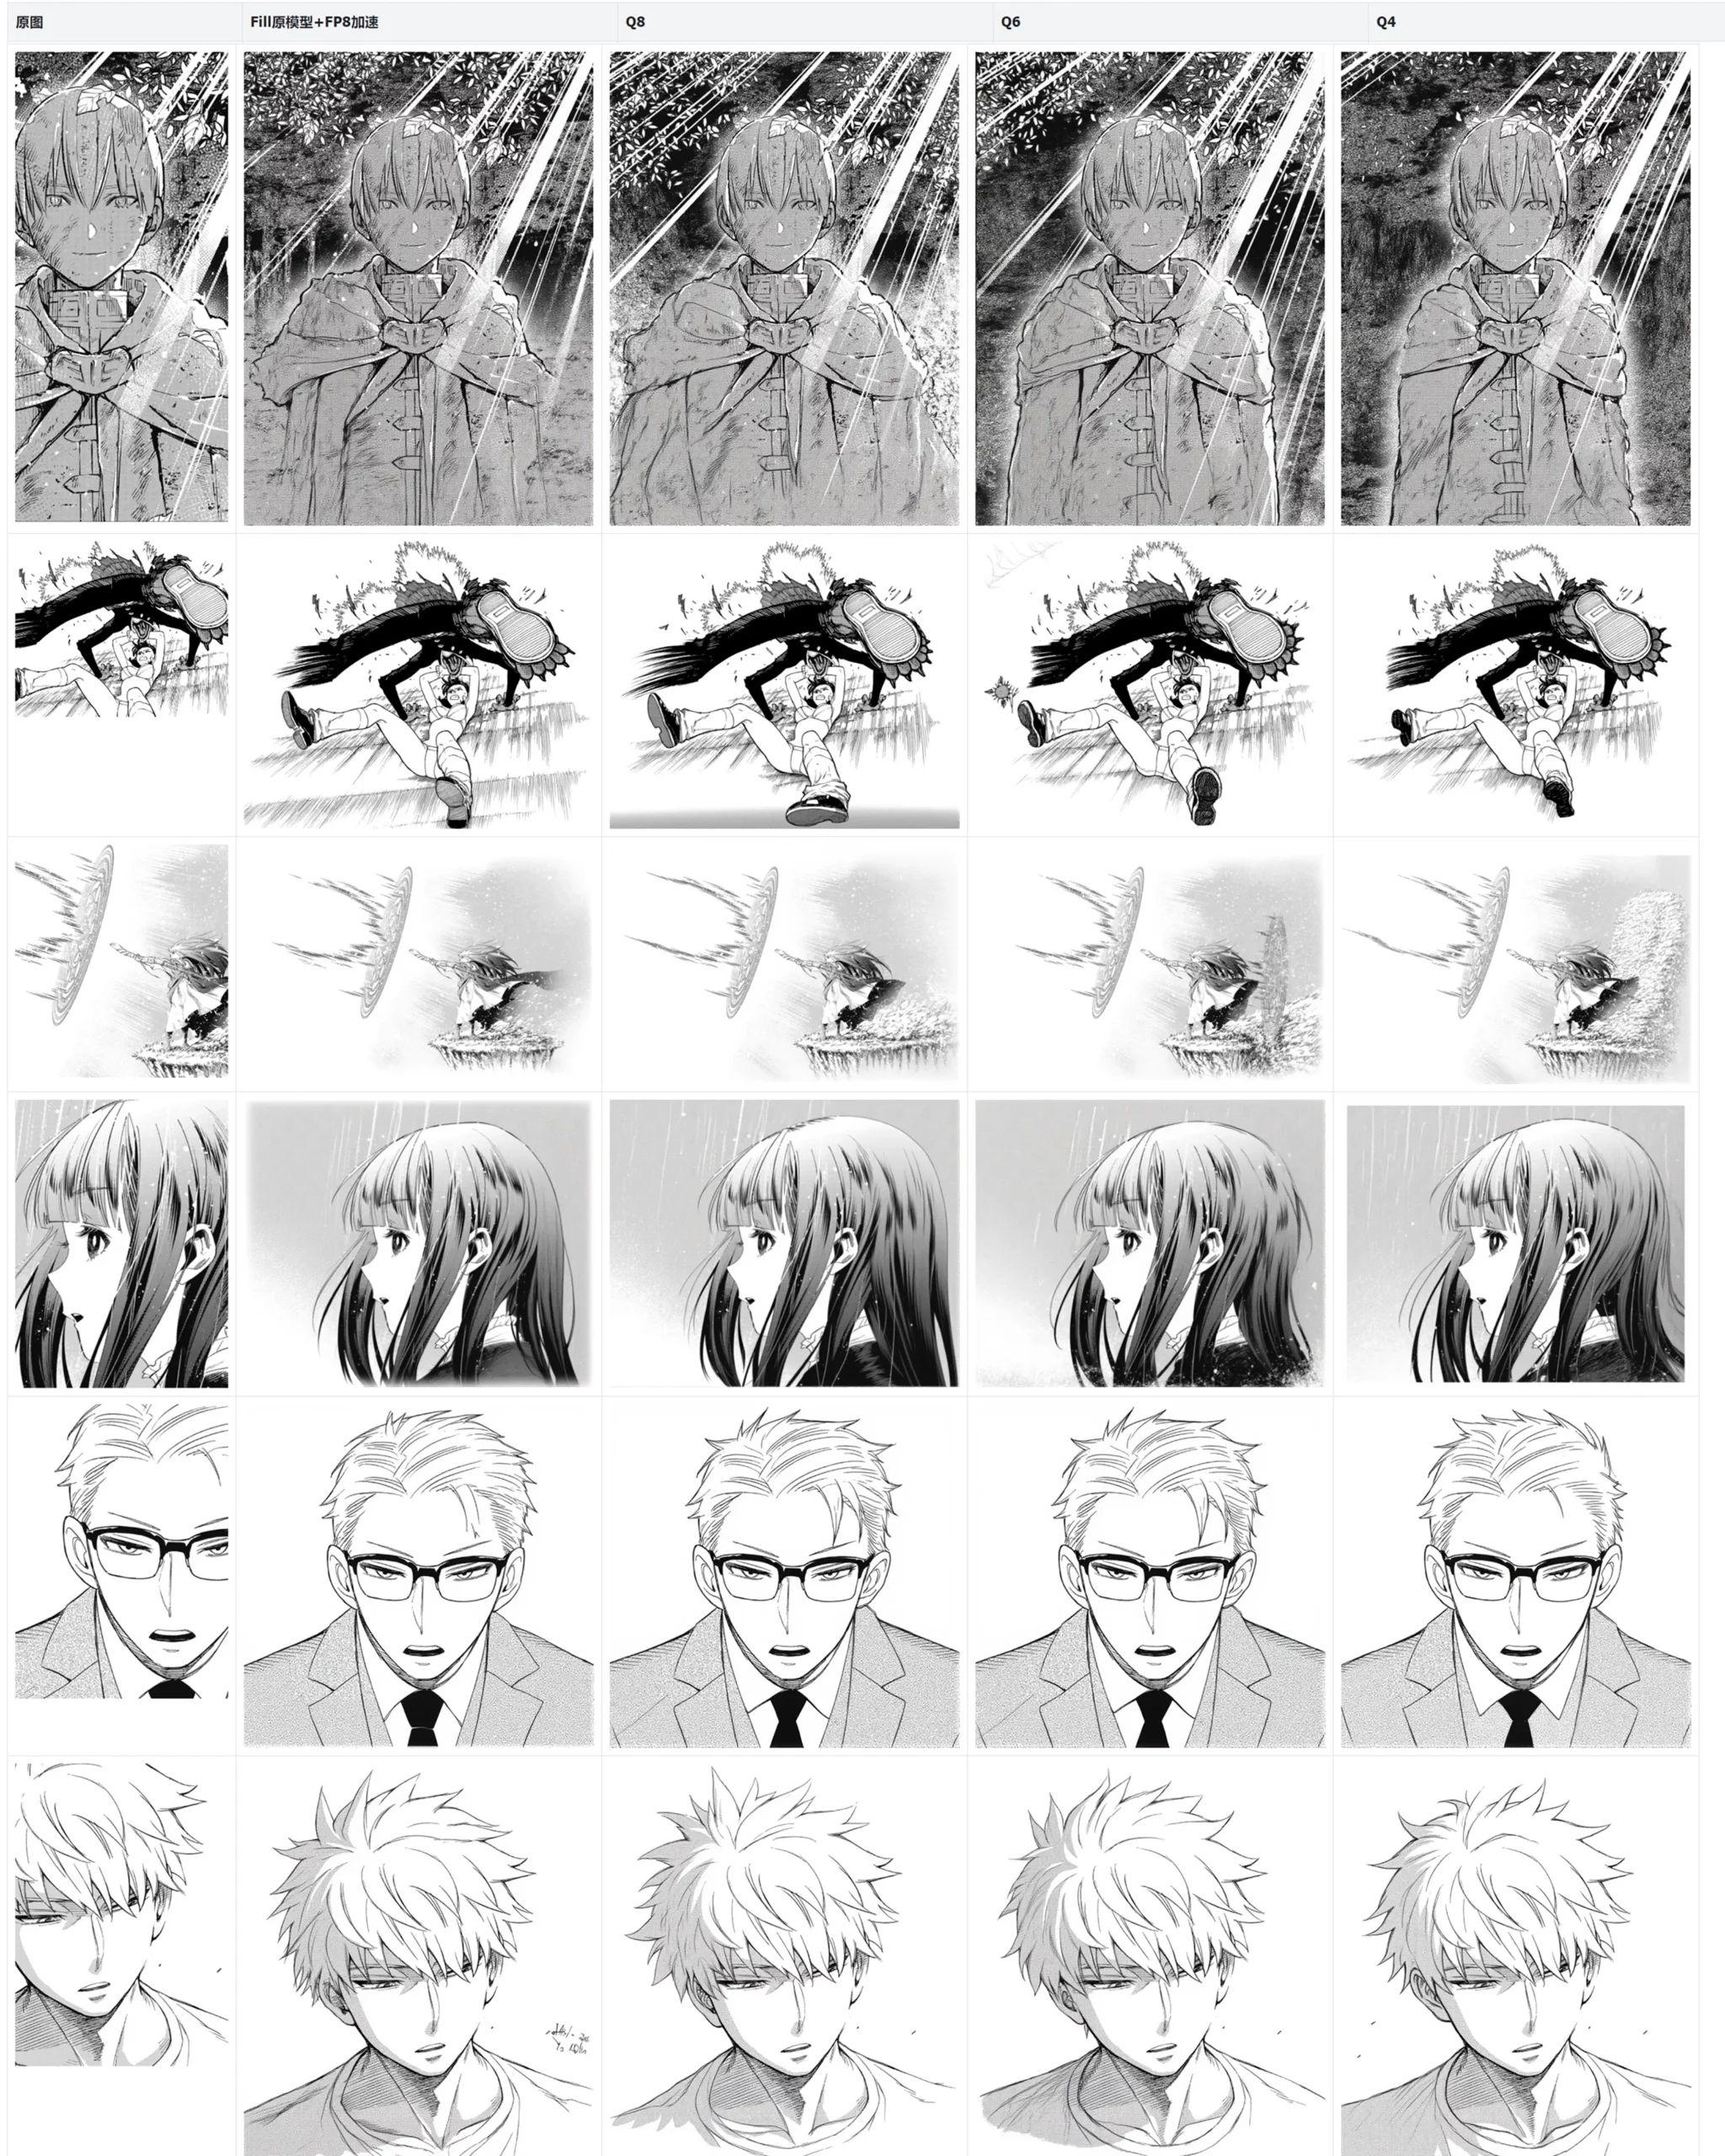
Effect Display
You can view the detailed images on Feishu.
Redrawing Effect ⬇
Image Expansion Effect ⬇
Image Masking Effect ⬇
Installation Tutorial
Basic Files
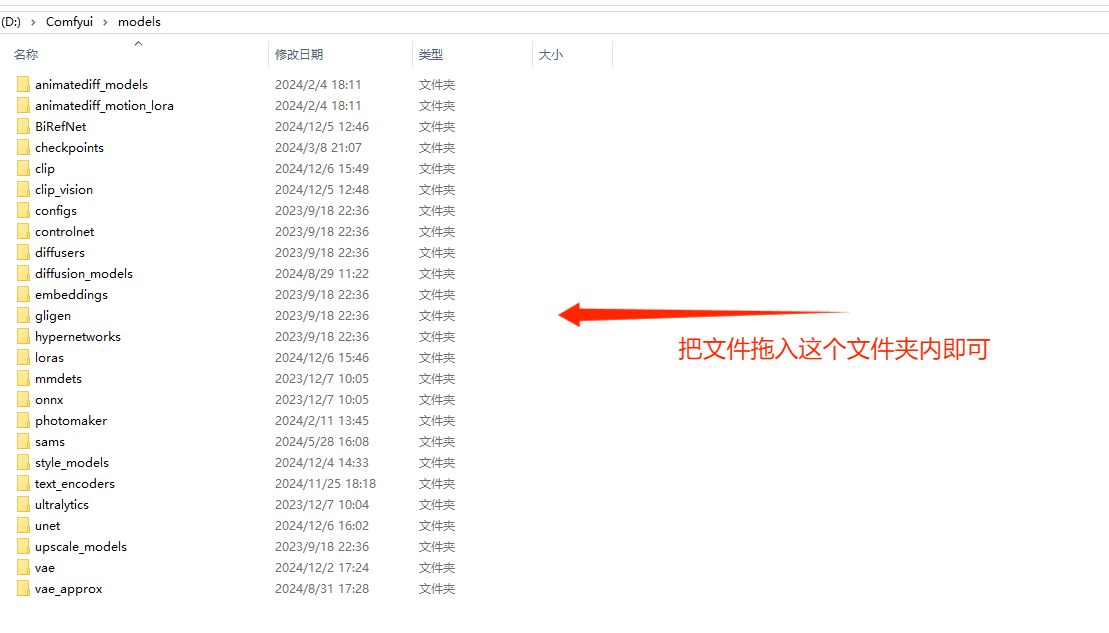
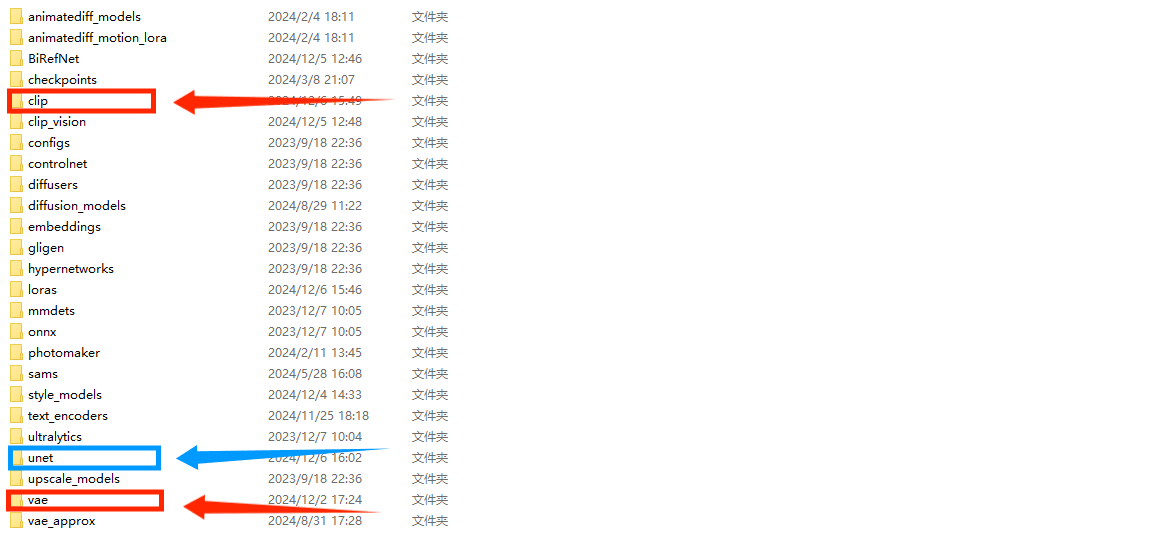
Next, we proceed with the necessary model downloads. The required files include clip, VAE, and UNet (the UNet file is divided into the original model and the quantized model; download the one that suits your VRAM). After downloading, place the files into the root directory folder of ComfyUI as follows:
Comfyui\models\clip
Comfyui\models\vae
Comfyui\models\unet
Baidu Cloud Storage File Location ⬇
Plugin Installation
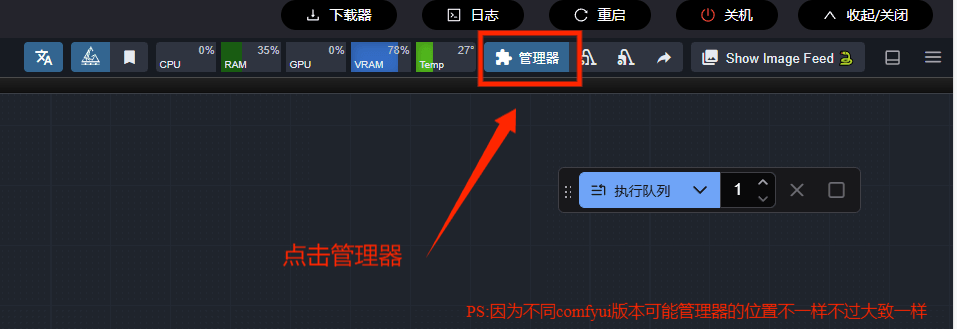
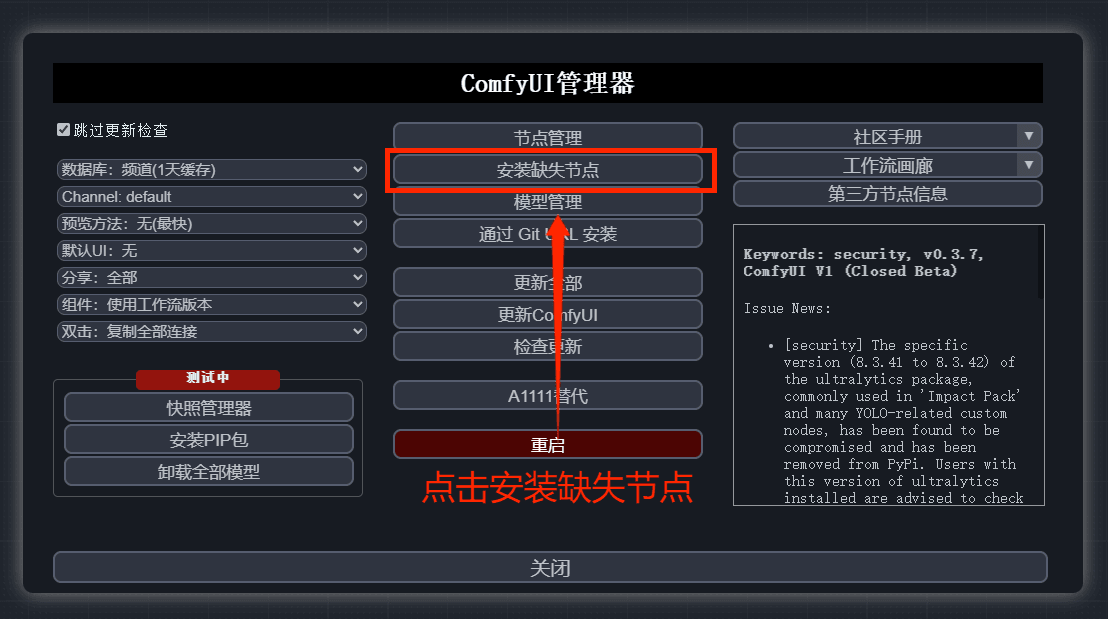
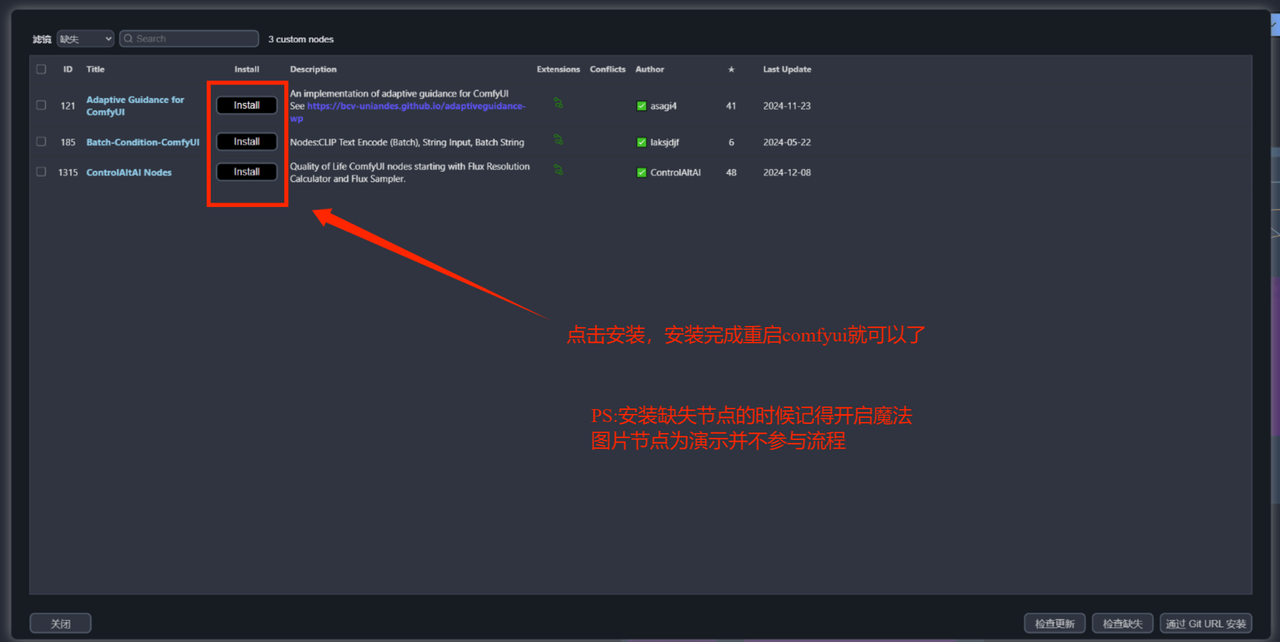
If you are using Qiuye's original launcher, an additional step for plugin installation is required. If you are using the pre-packaged integration package, you can skip this step.
Step 1
Step 2
Step 3
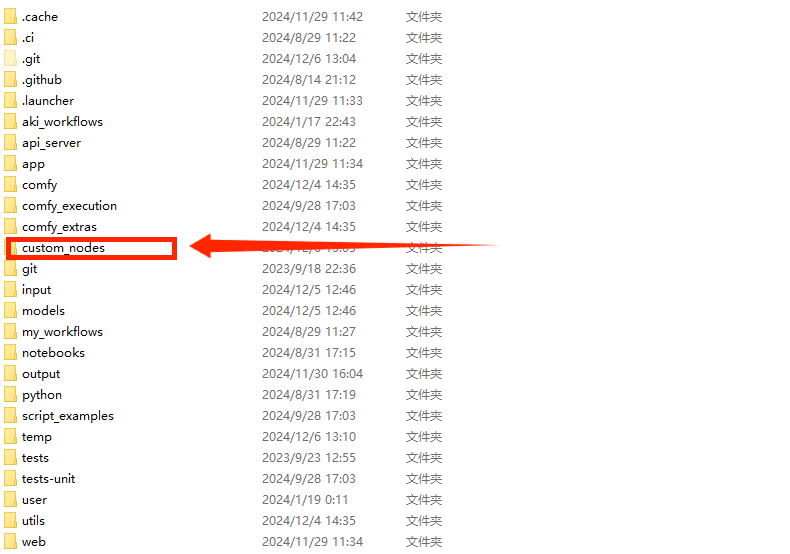
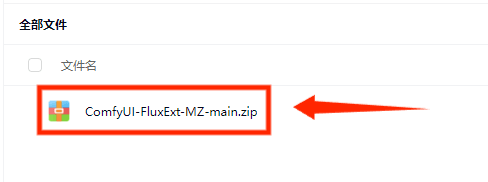
After installing the above plugins, you also need to manually install one more plugin, as it is not included in the ComfyUI library. After downloading the compressed package, unzip it and place the files in this directory ⬇
Comfyui\custom_nodes
Download the plugin from the cloud storage.
Image Masking Files
If you are using the pre-packaged files, you can skip the image masking plugin installation process. If not, just follow the plugin installation guide in the tutorial (PS: Remember to enable magic).
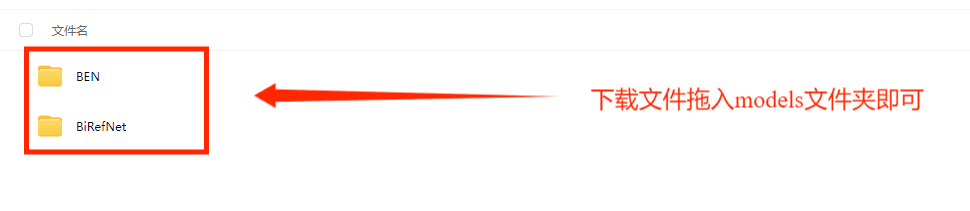
After the plugin installation is complete, simply drag the image masking files into the models folder ⬇
Comfyui\models
Cloud Storage Download Link

NoteNote: Since the plugin will automatically download some models during the image masking process, you need to enable the proxy.Please do not interrupt the proxy.
Usage Instructions
1. Redrawing
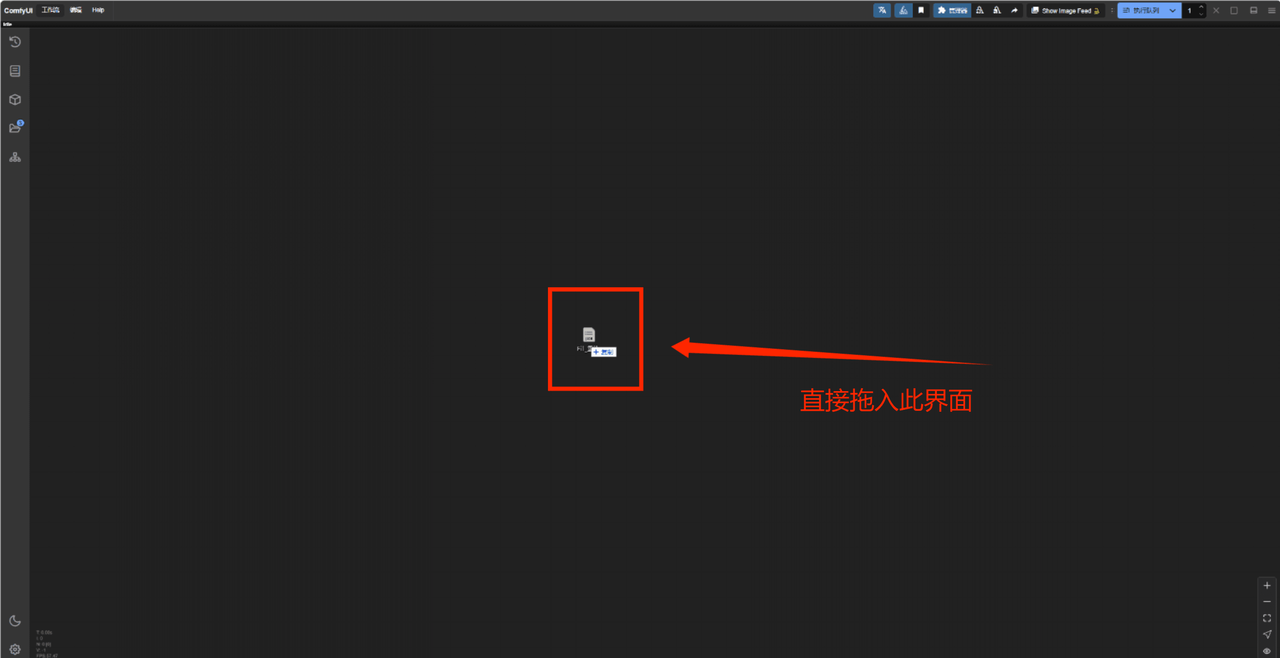
Open the HuiShi launcher and run it. When the workspace interface pops up, drag the workflow file (JSON file) into the interface.
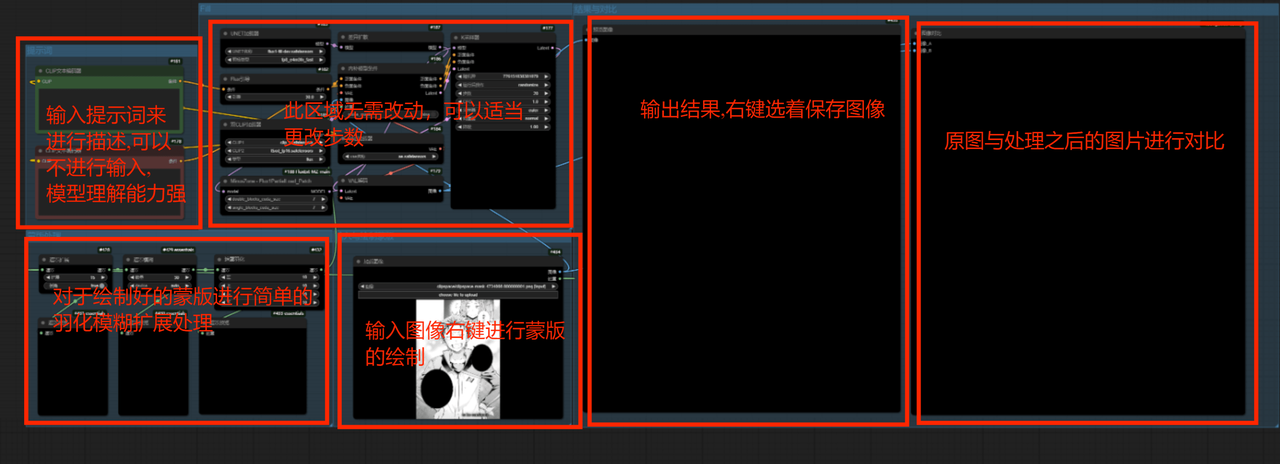
Afterward, we will have a workflow like the image below.
PS: The text and boxes are prompt descriptions and workflow thumbnails ⬇
Step 1
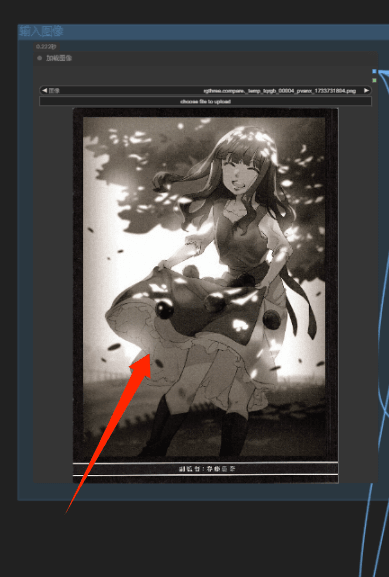
Drag the image into the "Load Image" section, right-click, and open the mask editor to draw the mask area. After that, save the changes.
Masking Tips:
Old Version Masking Method ⬇
① When painting the mask:Scroll wheelControl the brush size.
② MouseLeft-click + CtrlDrag the canvas position
③Alt + Left-click.Apply the eraser mask
New version of mask operation method⬇
① On the left toolbar.Brush,Eraser,EyedropperandFlip the masktools to draw the mask.
② On the right side of the interface, there are*detailed parameter adjustments*, similar to the PS interface.
*The new version of ComfyUI has a better user interface. It's recommended to try adjusting it yourself or watch video tutorials.
Step 2
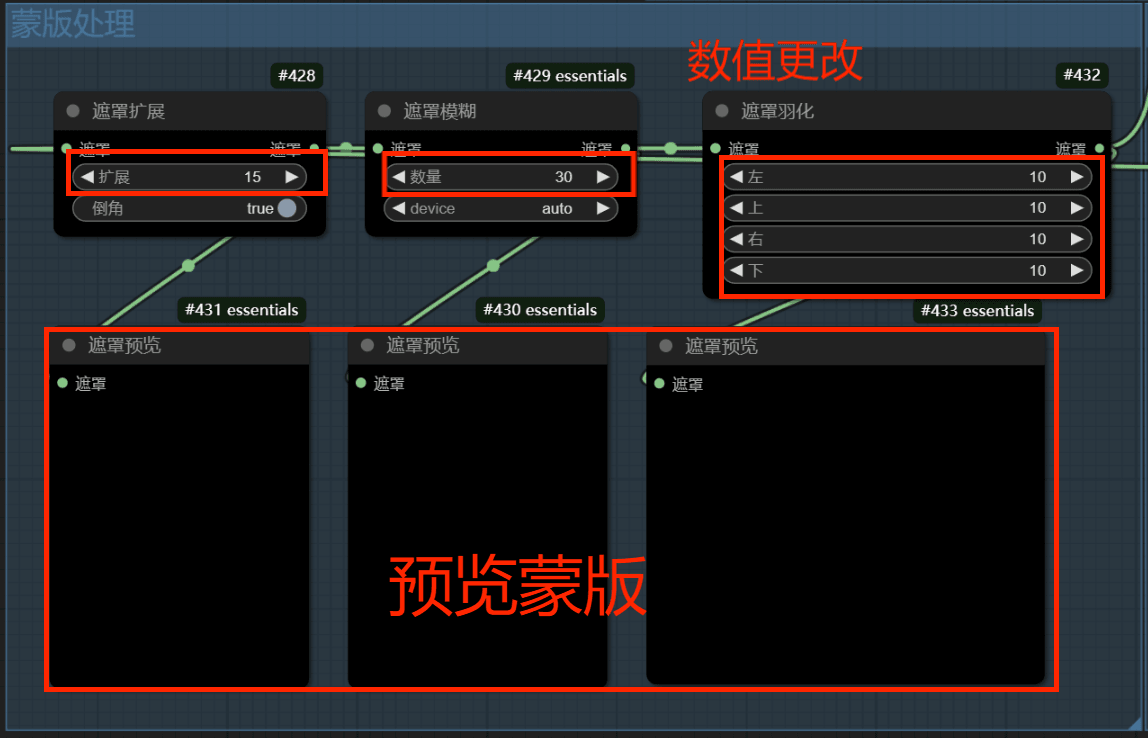
In the mask handling section, you can make appropriate numerical adjustments (or keep them unchanged).
Step 3
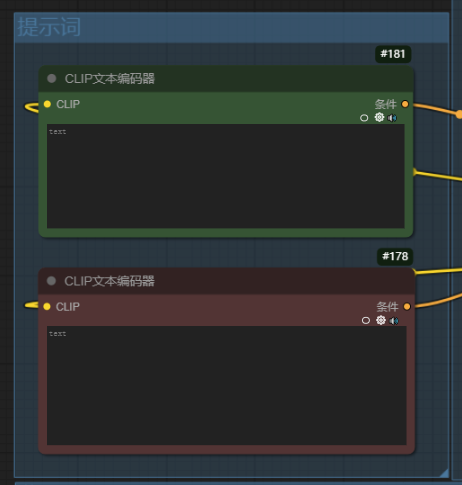
You can write prompt words appropriately, or you can choose not to. The Flux model is very powerful.
Step 4
After completing the above steps, click to execute the queue and wait for the image to be generated.
2. Image Upscaling
Open the HuiShi launcher and run it. When the workspace interface pops up, drag the workflow file (JSON file) into the interface.
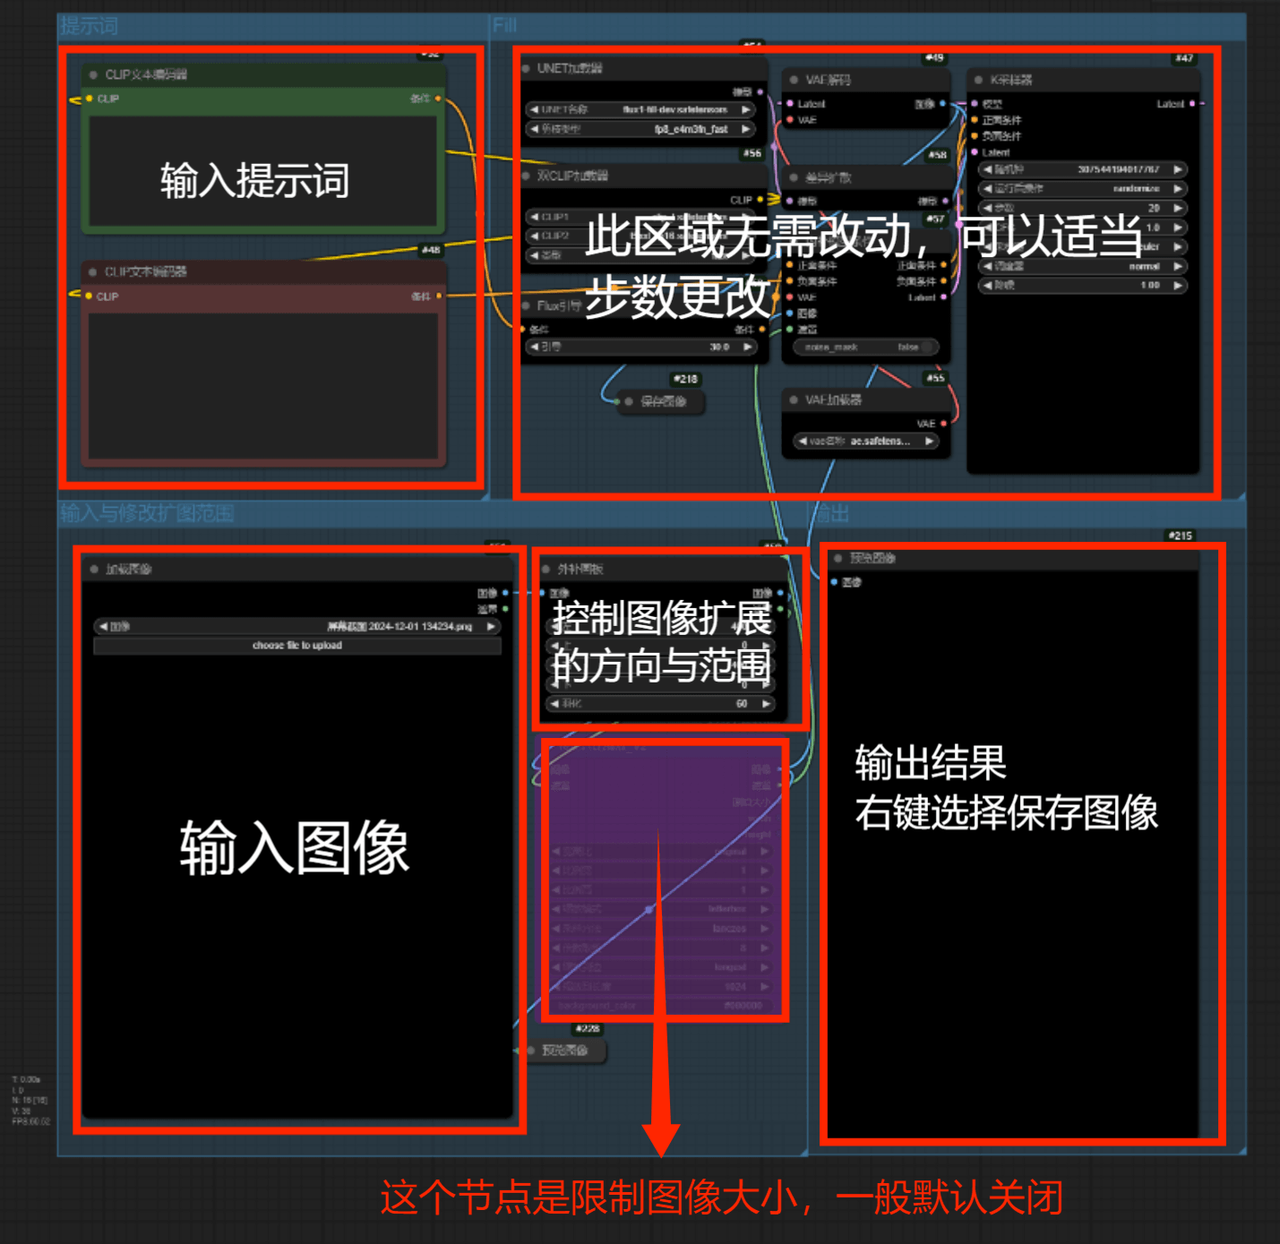
Afterward, we will have a workflow like the image below.
PS: The text and boxes are for prompt descriptions and process thumbnails.
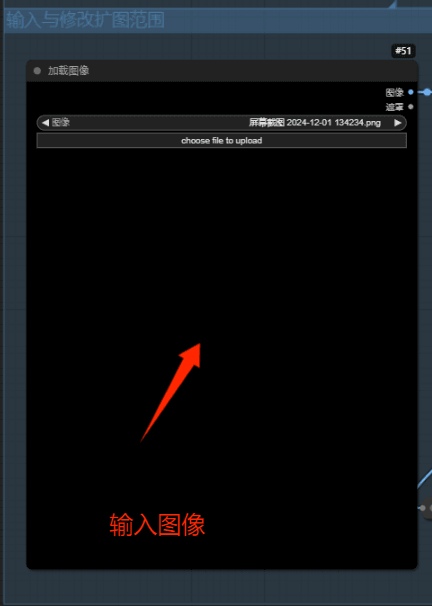
Step 1
Drag the image into the "Load Image" section.
Step 2
Modify the external canvas values to adjust the direction and range you want to extend (clicking the preview image dot will show the expansion area).
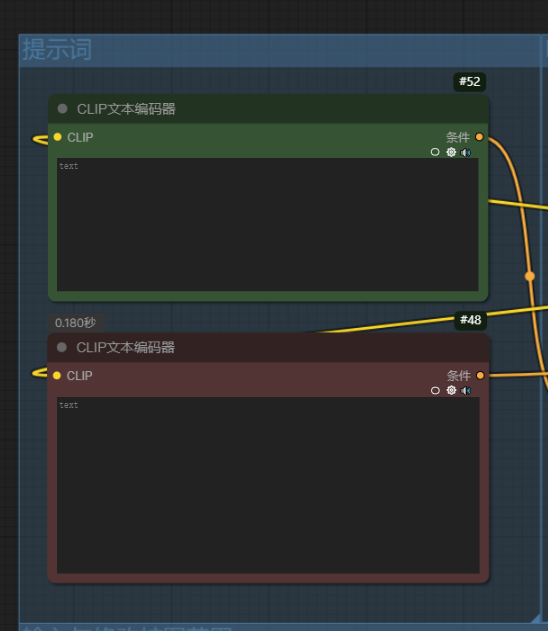
Step 3
Write appropriate prompt words (you can leave it empty for the model to understand on its own, or provide your own expansion ideas, or use reverse query plugins in combination).
Step 4
After completing the above steps, click to execute the queue and wait for the image to be generated.
3. Image Masking
Four image masking models—BiRefNet V2,Ben,RMBG-2,Inspyrenet—are combined. Choose the appropriate masking result and output a PNG image with a transparent channel and mask
.
Step 1
Open the Drawing World launcher and run it. When the workspace interface pops up, drag the workflow file (json file) into the interface. Afterward, you will see the following workflow.
PS: The text and boxes are for prompt descriptions and process thumbnails.
Step 2
Drag the image into the "Load Image" section.
Step 3
After completing the above steps, click to execute the queue and wait for the image to be generated.
Conclusion
In this ComfyUI tutorial, we utilized the powerful image capabilities and understanding of Flux_Fill to quickly complete image inpainting and upscaling processing.
Using RMBG 2.0, BEN, Inspyrenet, and BiRefnet v2 for simple image masking, but currently, the results for anime-related images are not ideal.
- clip:https://huggingface.co/comfyanonymous/flux_text_encoders/tree/main
- vae:https://huggingface.co/black-forest-labs/FLUX.1-schnell/blob/main/ae.safetensors
- Fill:https://huggingface.co/black-forest-labs/FLUX.1-Fill-dev/tree/main
- T8 Quantized Fill:https://huggingface.co/t8star
- FluxExt-MZ:https://github.com/MinusZoneAI/ComfyUI-FluxExt-MZ
- RMBG 2.0:https://github.com/gorillaframeai/GF_nodes
- BEN:https://github.com/DoctorDiffusion/ComfyUI-BEN
- Inspyrenet:https://github.com/john-mnz/ComfyUI-Inspyrenet-Rembg
- BiRefnet v2:https://github.com/ZhengPeng7/BiRefNet

Effect Display
Redrawing Effect ⬇
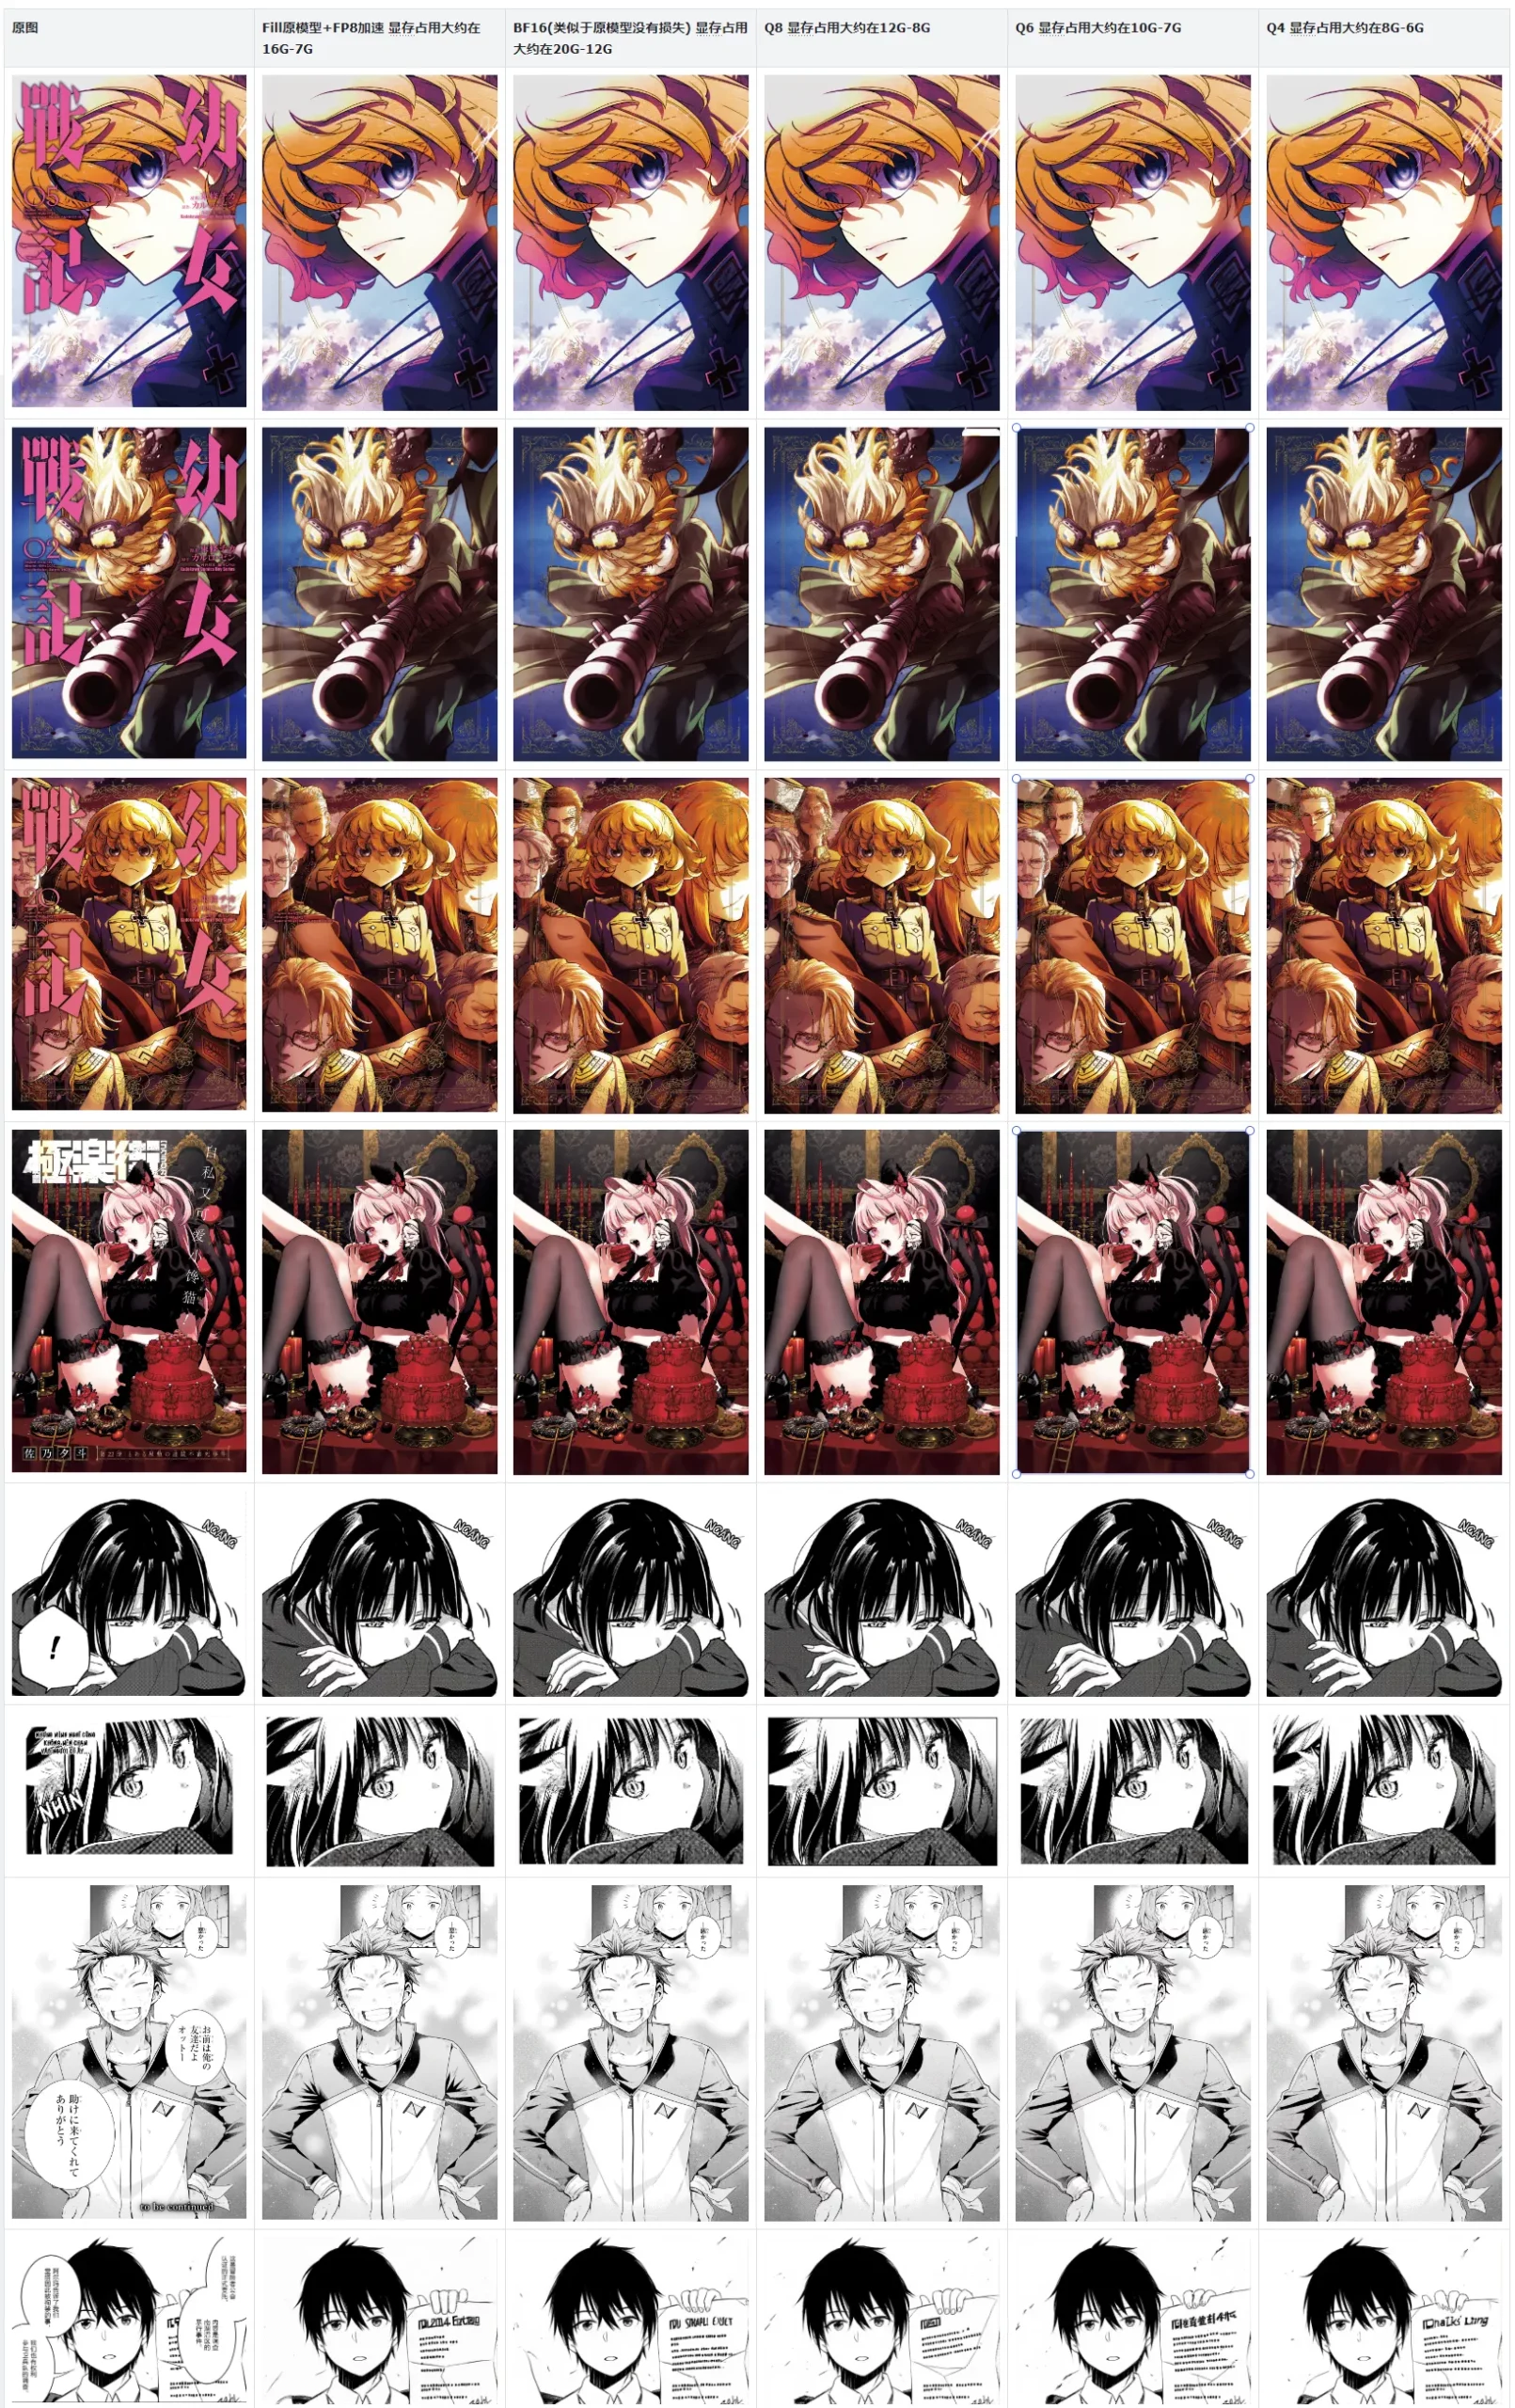
Image Expansion Effect ⬇
Image Masking Effect ⬇
Installation Tutorial
Basic Files


Step 1
Step 2
Step 3


Usage Instructions
1. Redrawing
Step 1

Masking Tips:
Old Version Masking Method ⬇
① When painting the mask:Scroll wheelControl the brush size.
② MouseLeft-click + CtrlDrag the canvas position
③Alt + Left-click.Apply the eraser mask
New version of mask operation method⬇
① On the left toolbar.Brush,Eraser,EyedropperandFlip the masktools to draw the mask.
② On the right side of the interface, there are*detailed parameter adjustments*, similar to the PS interface.
*The new version of ComfyUI has a better user interface. It's recommended to try adjusting it yourself or watch video tutorials.

Step 2
Step 3
Step 4

2. Image Upscaling
Step 1
Step 2

Step 3
Write appropriate prompt words (you can leave it empty for the model to understand on its own, or provide your own expansion ideas, or use reverse query plugins in combination).
Step 4

3. Image Masking
Step 1
Open the Drawing World launcher and run it. When the workspace interface pops up, drag the workflow file (json file) into the interface. Afterward, you will see the following workflow. PS: The text and boxes are for prompt descriptions and process thumbnails.

Step 2
Step 3

Conclusion


京公网安备11011502038441号